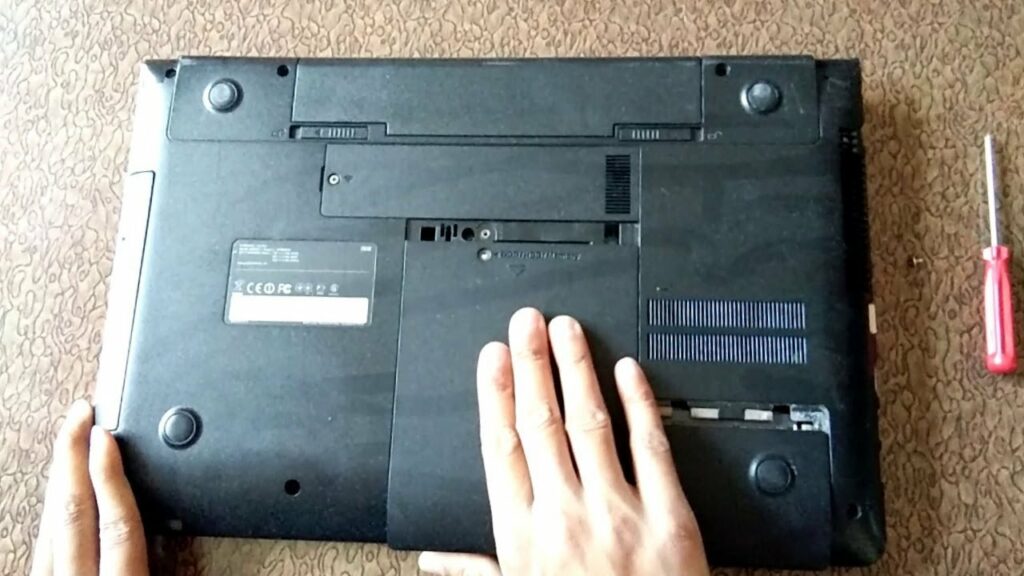
Are you looking to replace or upgrade the hard drive in your Samsung laptop? Whether you’re seeking more storage or simply upgrading to a faster model, knowing how to safely remove your hard drive is crucial. In this guide, we’ll walk you through the entire process, ensuring that you’ll feel confident in completing this task efficiently and successfully.
Tools Needed
Before you dive into the hard drive removal process, it’s essential to gather the necessary tools. Here’s what you’ll need:
- Phillips head screwdriver: For removing screws from the laptop.
- Anti-static wrist strap: To prevent static electricity from damaging your components.
- Plastic prying tool: For safely opening the compartment without causing damage.
How to Take the Hard Drive from a Samsung Laptop
Preparing for Hard Drive Removal
Backup Your Data
Before starting any hardware work, ensure that all your important files are securely backed up. You can use cloud services like Google Drive or Dropbox, or transfer your files to an external drive for safekeeping. This step is vital to avoiding data loss during the transition.
Power Down and Disconnect
To prevent any accidents while working on your laptop:
- Safely shut down your Samsung laptop.
- Disconnect it from the power source.
- If applicable, remove the battery as an extra precaution.
Accessing the Hard Drive
Locate the Hard Drive Compartment
Finding the hard drive compartment is your first step. Typically, it’s located on the underside of the laptop. Look for a panel secured by screws (or sometimes a latch), as this is where you’ll access the hard drive. Refer to your laptop’s manual for specific instructions tailored to your model.
Unscrewing the Compartment Panel
With the right tools in hand, proceed to remove the screws holding the compartment panel in place. Keep track of where each screw comes from by placing them in separate containers or using a magnetic strip. This organization will save you time and frustration when reassembling your laptop.
Removing the Hard Drive
Detaching the Hard Drive
Once you’ve accessed the hard drive compartment, the next step is to carefully disconnect the hard drive. Gently pull out any connectors or cables connected to it, taking care not to bend or break anything. Once everything is detached, lift the hard drive out of its bay carefully.
Inspecting the Hard Drive
Before replacing or upgrading, take a moment to inspect the condition of your old hard drive. Look for any signs of wear, such as unusual sounds or physical damage, which may indicate the need for replacement.
Conclusion
You’ve successfully navigated the steps to remove the hard drive from your Samsung laptop! Remember to perform each step with care to ensure the safety of your hardware. Whether you’re upgrading to a larger capacity drive or switching to a solid-state drive for better performance, you’re one step closer to optimizing your device.
FAQs
- Can I replace the hard drive with any model?
It’s crucial to check compatibility; refer to your laptop’s documentation or manufacturer’s website for recommended upgrades.
- How do I reinstall the operating system after replacing the hard drive?
After installing the new hard drive, you’ll need to boot from an external installation media (USB drive or DVD) to reinstall your operating system.


