

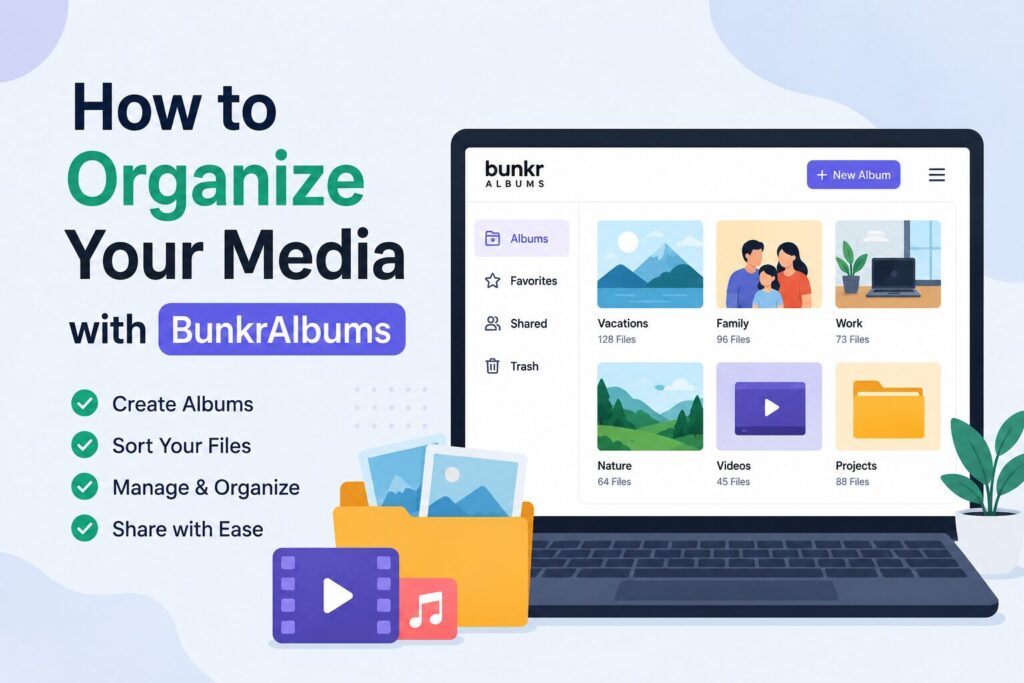
Digital media can get messy faster than most people expect. One day you have a few photos and videos saved for later, and before you know it, your files are scattered across your phone, laptop, cloud drive, downloads folder, and different sharing platforms. This is where BunkrAlbums can become useful, especially if you want a cleaner way to manage image albums, video albums, and other digital files in one organized system.
But uploading files is only one part of the process. Real media organization is about creating a setup that helps you find, manage, update, and share your files without confusion. Whether you are organizing personal photos, blog images, social media clips, client files, or creative projects, the goal is simple: your media library should make sense every time you open it.
How to Organize Your Media with BunkrAlbums
To organize your media with BunkrAlbums, start by sorting your files before uploading, creating clear album categories, naming your files properly, separating private and public media, and keeping backup copies outside the platform. A good system saves time and prevents your online albums from turning into a cluttered storage dump.
Many users make the mistake of uploading everything first and thinking they will organize it later. That usually creates more work. A better approach is to treat Bunkr Albums like a clean digital shelf. Every album should have a purpose, every file should be easy to understand, and every shared link should be checked before sending it to someone else.
Start by Cleaning Your Media Before Uploading
Before creating albums, take a few minutes to review your files. This small step can save you hours later. Open the folder where your photos, videos, screenshots, or documents are stored and remove anything you no longer need.
You may find blurry photos, repeated downloads, unfinished clips, old drafts, or files with names that mean nothing anymore. If those files are not useful, do not upload them. A clean upload folder makes digital media storage easier from the beginning.
A simple way to start is by creating a temporary folder on your device. You can name it:
- BunkrAlbums Uploads
- Media Sorting Folder
- Final Media Files
- Ready to Upload
- Organized Media
Use this folder as a holding area. Add only the media you actually want to keep. Then divide everything into basic groups like photos, videos, screenshots, documents, design files, and archive files.
Create Clear Album Categories
Strong album management starts with strong categories. If your album names are vague, your whole system becomes harder to use. Names like “Random,” “New Files,” “Stuff,” or “Upload 1” may feel quick at the moment, but they become confusing later.
Instead, create album categories based on purpose. For example, if you are a blogger, you might create separate albums for blog featured images, tutorial screenshots, article graphics, and social media visuals. If you are a content creator, your albums may include YouTube thumbnails, TikTok clips, Instagram posts, raw videos, and final edits.
Good album category examples include:
- Blog Images for Hair Care Articles
- Product Photos for Spring Campaign
- Travel Videos 2026
- Client Website Media Assets
- Final YouTube Thumbnail Designs
- Personal Family Photos
- Social Media Video Clips
This type of structure makes your content organization more practical. You do not have to open every album to remember what is inside. The title already gives you the answer.
Use a Simple File Naming System
A good file naming system can make your media folders much easier to manage. Random file names like “IMG_2049,” “finalfinal2,” or “video-new-copy” are hard to search and even harder to understand later.
Try using a clean formula for your files:
topic-purpose-date-version
For example:
- purple-shampoo-blog-image-2026-final
- product-photo-skincare-main-v1
- travel-video-dubai-2026-final
- youtube-thumbnail-kai-cenat-height
- client-logo-design-v2
You do not need to make file names too long. The goal is to make them clear. Anyone should be able to look at the file name and understand what it is. This is especially helpful if you use BunkrAlbums for work, blogging, social media, or client projects.
Consistency matters too. If you use “final” for completed files, keep using that word. If you use “draft” for unfinished files, use it everywhere. This small habit makes digital content management smoother.
Separate Private, Public, and Work Media
One of the most important parts of using any file hosting or media sharing platform is privacy. Do not mix private files with albums that you may share publicly. It only takes one wrong link or one unchecked album to create a problem.
Create separate spaces for different types of media:
- Private media
- Public media
- Work files
- Client media
- Social media content
- Archive files
- Shareable albums
Before sharing a BunkrAlbums link, open the album and review every file inside. Make sure there are no private photos, sensitive documents, unfinished drafts, or files that do not belong there.
Also, only upload and share media that you own, created yourself, or have permission to use. This is important for personal safety, copyright, and trust. Secure file sharing is not just about where you upload files. It is also about being careful with what you share and who can access it.
Organize Photos and Videos Differently
Photos and videos should not always be handled the same way. Image albums are usually easier to scan quickly, while video albums can become heavy, harder to preview, and more confusing if you have several versions.
For images, organize by topic, project, date, or use case. For example:
- Blog featured images
- Product photos
- Instagram carousel images
- Tutorial screenshots
- Raw photos
- Edited photos
For videos, use labels that show the purpose and version clearly. For example:
- interview-video-final-1080p
- product-demo-short-v1
- tiktok-video-draft-v2
- youtube-intro-final
- travel-vlog-raw-footage
This helps you avoid mixing raw clips with final edits. It also makes your cloud-based media storage easier to browse when you return to it after weeks or months.
Remove Duplicates Before They Take Over
Duplicate files are one of the biggest reasons a media library becomes messy. They usually happen when you upload from multiple devices, save the same image in different places, export several versions of a video, or forget that a file already exists in another album.
Before uploading to Bunkr Albums, check for duplicates. Keep the best-quality version and delete the rest if they are not needed. If you need to keep multiple versions, label them clearly.
For example:
- logo-design-v1
- logo-design-v2
- logo-design-final
- video-edit-draft
- video-edit-approved
This way, you know which file is current and which one is only an older version. It keeps your album categories cleaner and helps you avoid sending the wrong file to someone.
Add Notes or Context Where Needed
If your album allows descriptions, use them. A short description can make a big difference, especially for work files, client projects, or large online albums.
You can include details like:
- What the album is for
- When the files were uploaded
- Whether the files are drafts or final versions
- Who the album is meant for
- Any usage instructions
- Whether the album is private or shareable
For example, you might write:
“This album contains final edited images for the May 2026 blog content. Use only files marked final.”
That one sentence can prevent confusion later. If descriptions are not available, keep a simple note file or spreadsheet with your album names and their purpose.
Keep a Backup Outside BunkrAlbums
Even if BunkrAlbums is useful for digital media storage, it should not be the only place where your important files exist. Any online platform can have access issues, broken links, deleted files, or account problems. A backup gives you protection.
A simple backup system includes:
- One copy on your computer or external drive
- One copy in your online album
- One backup copy in another safe location
This is especially important for client work, personal memories, business files, and creative projects. If a file matters, do not rely on one platform only.
Share Albums with Care
Media sharing is convenient, but it should never be rushed. Before sending an album link, check it like you would check an email before sending it to a client or public audience.
Ask yourself:
- Is this the correct album?
- Are the files safe to share?
- Are there any private files inside?
- Are the file names clean and professional?
- Are draft files clearly marked?
- Do I have permission to share this content?
This habit is especially useful for freelancers, bloggers, creators, students, and anyone using private media hosting or public sharing links.
Build a Simple Long-Term System
The best BunkrAlbums setup is one you can actually maintain. Do not create too many categories if you do not need them. Start with a few main sections and expand only when necessary.
A beginner-friendly structure could look like this:
- Personal Media
- Blog and Website Media
- Social Media Content
- Work or Client Files
- Video Projects
- Archive
Inside each album, keep your file names clear and your content focused. If an album starts feeling too full, split it into smaller albums by date, project, or purpose.
Review Your Albums Regularly
Organizing your media once is helpful, but keeping it organized is even better. Set a habit of reviewing your BunkrAlbums every few weeks or once a month, depending on how often you upload.
During your review, you can:
- Delete old drafts
- Rename unclear files
- Move media into better albums
- Remove duplicate uploads
- Archive finished projects
- Check shared links
- Update album descriptions
- Back up important files
This keeps your digital content management system clean over time. It also prevents your albums from becoming another messy storage space.
A Practical Workflow for Organizing Media
Here is a simple workflow you can follow whenever you want to organize photos and videos with BunkrAlbums:
- Collect all files in one temporary folder
- Delete unwanted or low-quality files
- Separate photos, videos, screenshots, and documents
- Rename important files using a clear system
- Create albums based on topic, date, project, or purpose
- Upload files into the correct albums
- Review each album before sharing
- Save backup copies somewhere else
- Clean and update your albums regularly
This workflow works for personal users, content creators, bloggers, website owners, freelancers, students, and anyone managing lots of digital files.
Keeping Your Media Library Easy to Use
The easiest way to organize your media with BunkrAlbums is to think before you upload. Every file should have a place. Every album should have a clear name. Every shared link should be checked. Every important file should have a backup.
When your BunkrAlbums setup is clean, your media becomes easier to find, easier to share, and easier to manage. Instead of wasting time searching through random uploads, you can open your albums and quickly find the photos, videos, documents, or creative files you need.